I have been buying blouse patterns... And I splurged and bought some black pindot satin at JoAnne's the other day, but then realized that I don't want a shiny black blouse with pindots... and so, I decided to make a camisole and tap pants, which I've been wearing a lot lately. I used some old cream lace that I had in my stash, and it looks sweet on the satin...
The set looks so sweet and feminine... and is just as pretty inside as out... French seams and cream lace... mmmmmmmmmm.
I'm sure most of you know what French seams are but, if not... I'll make a sort of tutorial about them, and how to press seams, too. Yay! So, without further ado... the Sweet Nothings... I have plans and materials to make two more sets, it was so easy and fun!
Project Cost: $8
Project Time: 5 hours
Pattern: One of Meemaw's she gave me long ago!!
Note to Self: I do not love the camisole, it is wearable, but not perfectly so... I think I'll try to draft a new one... or get a new cami pattern?
Well, Lovelies, the first thing that I want to say is this: sewing a garment that will last a long time, and continue to bring pleasure for years takes time to do it right. You don't just throw things together and say... ah, that's good enough! You CAN do that for things like children's halloween costumes, that are only used for one night... Who cares if they stay together or not, later?
One thing that is always a temptation for me, is to leave seams unfinished... I don't like to use my serger (a whole nother issue!!!) and I dislike the look of zigzagging.... I don't have pinking shears, which really only work on things that are lined, anyway (though I'm gonna get some of those soon!) My favorite way to finish a seam is to use a French seam, which does take a little longer, but is really an economical use of your time and energy, and works really well on straight seams and fine fabrics.
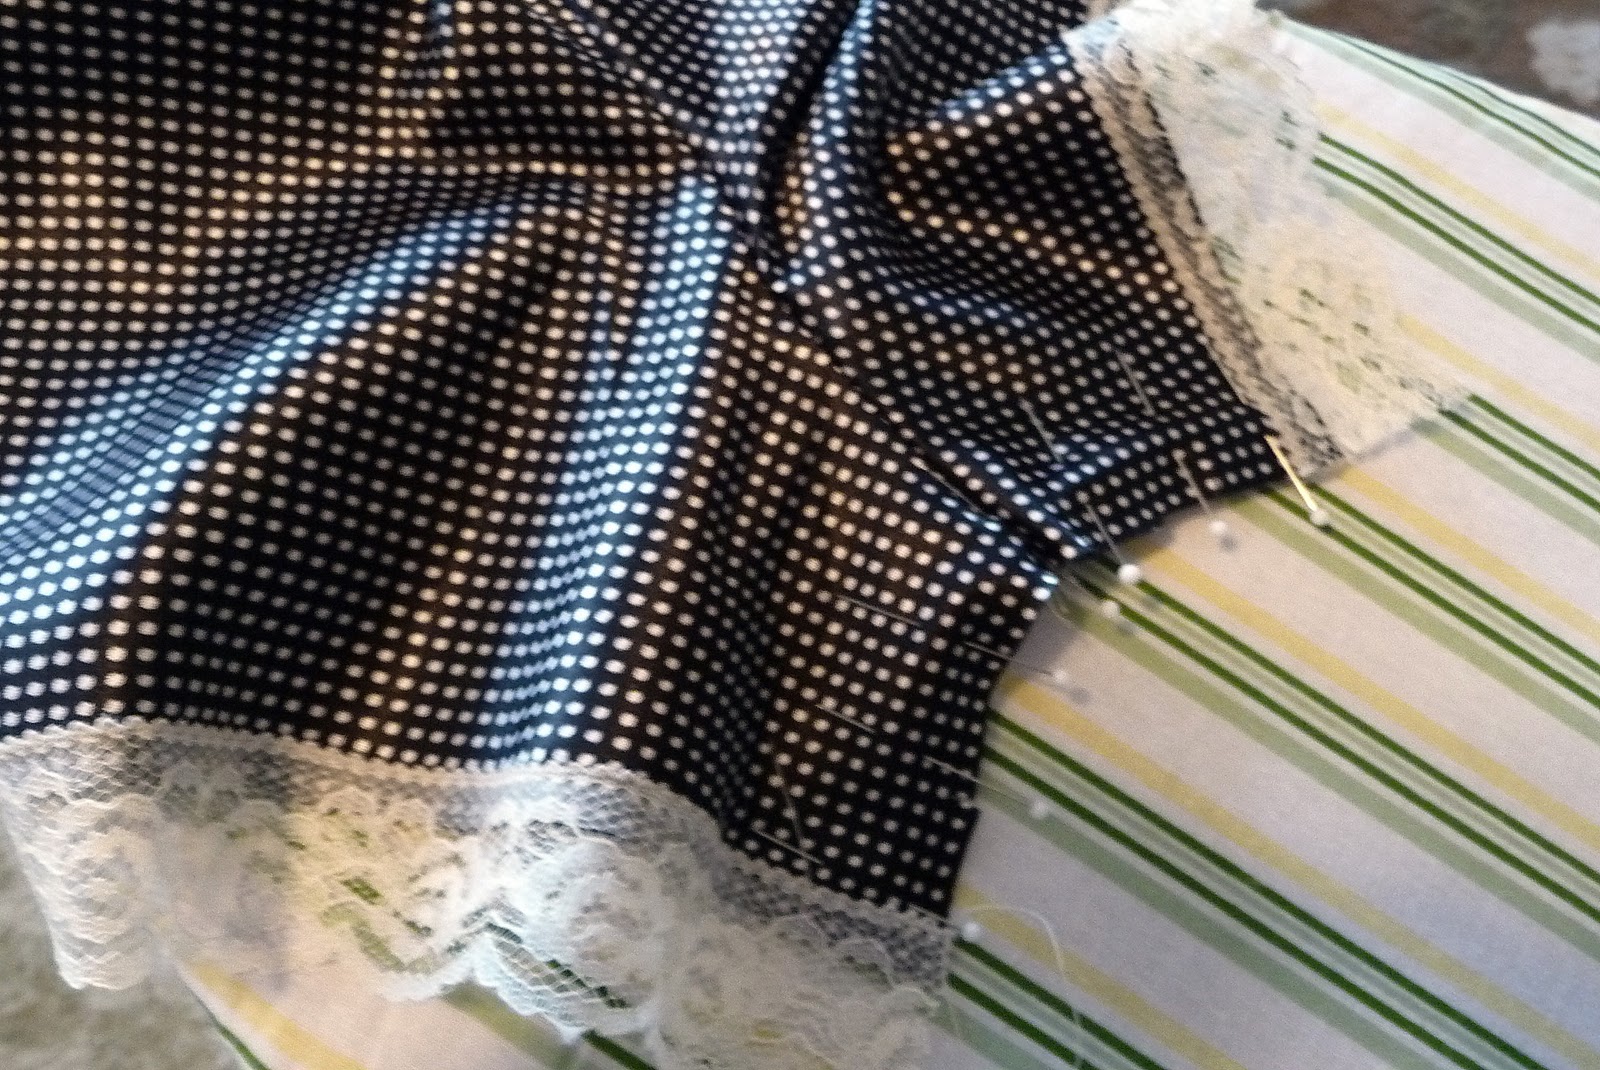
Most patterns have a seam allowance of 5/8 inch.. this means that if you're using a french Seam on your garment, you first pin your garment WRONG sides together, and stitch 1/4 inch from your edge.
Then you trim your seam to 1/8 inch, you don't want little bits of your fabric getting caught in your next seam, and you don't want it to be bulky, so trim it, carefully... I usually put the seam on the left and trim from the right of it... I'm much more precise like that.
Then you press, first one way...
Then the other...
Then you turn the garment inside out and press the seam from that direction...
And then you press it folded at the seamline and pin it for sewing that same seam again...
Yes, you just pressed it four times. Pressing is sooooo important to sewing and one of the first mistakes novices make... press and press and press... your garment will look good longer, will look more professional, and will lie better on your body if you can manage to take the time to press it, correctly. Now... to do it properly you need a couple of tools I do not yet have... a tailor's ham and a sleeve roll, for curved seams and sleeves... I'll get to those eventually... So for now I just do the VERY best I can with the tools I have.
Aaaaaaaaanyway, now you make another 1/4 inch seam, with fabric pinned RIGHT sides together, and enclose your edges inside that tube you're making, as you sew....
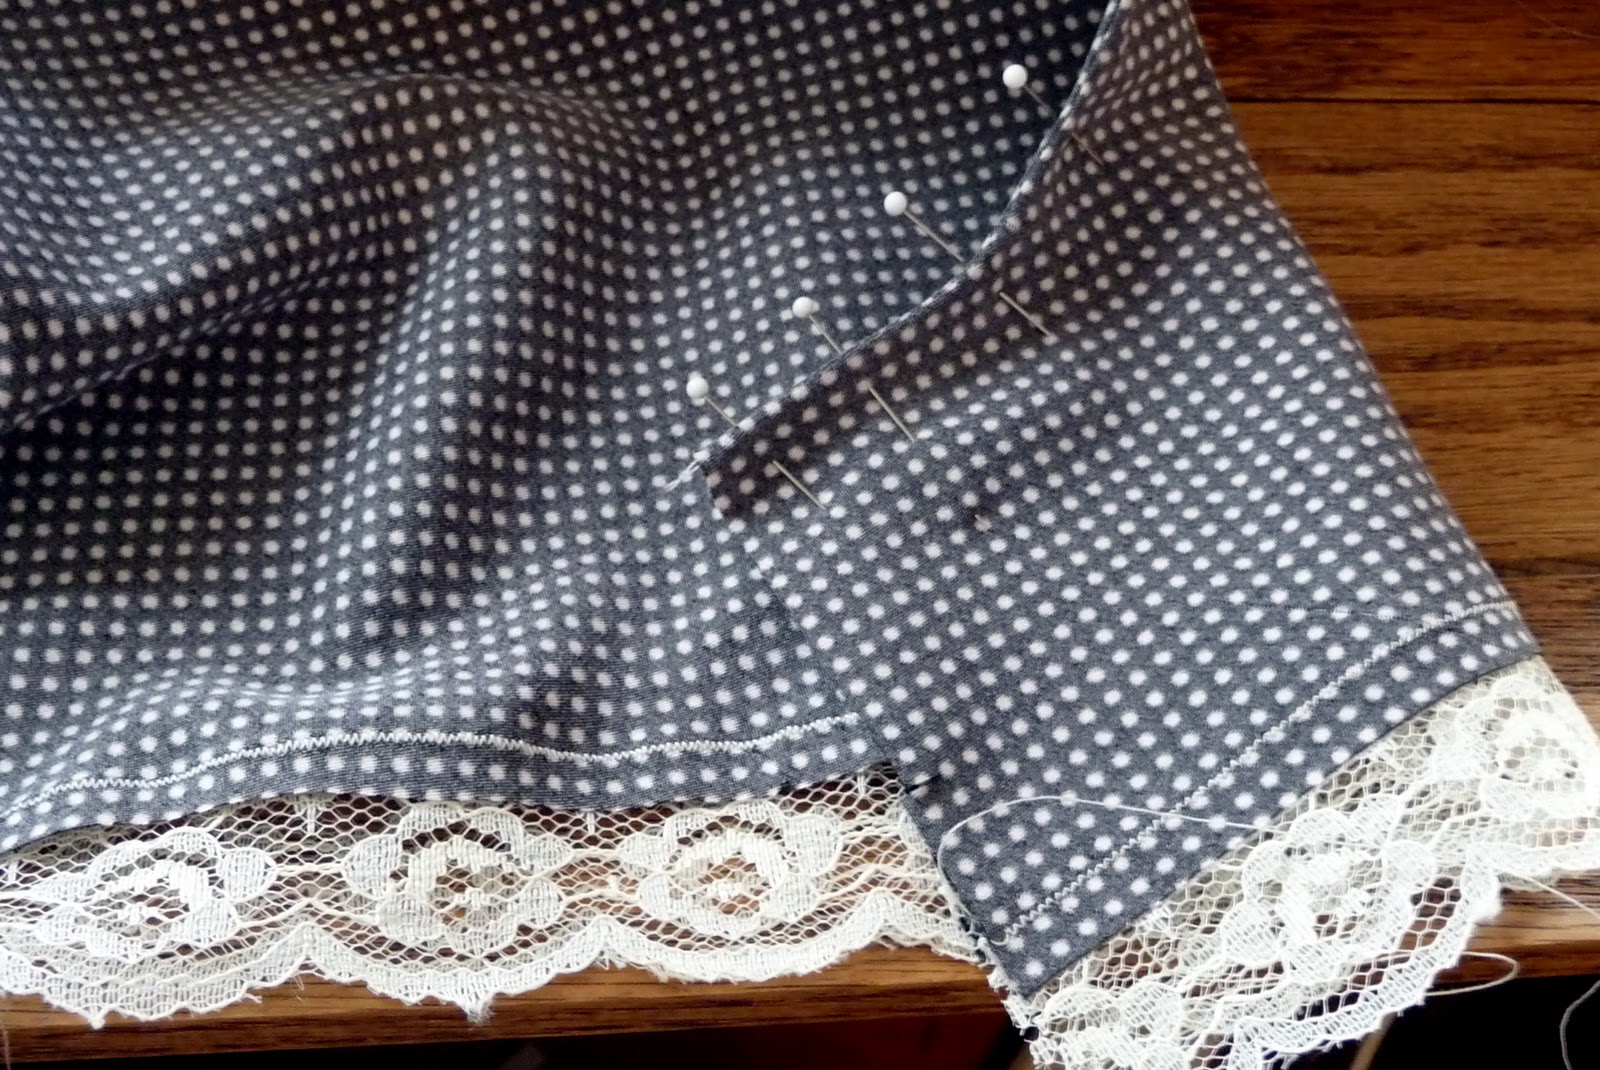
Here's the crotch of the tap pants, with my two french seams meeting in a third french seam... see how I pressed them in opposite directions before I sewed them together? That helps take a bit of the bulk out of the seam, making it smoother...
Now, why go to all that trouble? First, it'll help the garment last longer... an exposed seam will unravel a bit every time you wash it, ESPECIALLY on fine fabrics and silks, they're slippery fibers... and you're gonna wash undies a LOT. Second, it feels smoother against your skin, and this garment is worn right next to your skin! Third, it's so pretty!!!
 I made this project a couple of years ago... when I was a bit heavier... and I wear it constantly. I wear it so much that the ribbing had all been flattened out and the sweater was covered in little linty pills that made the sweater look ratty and old... SO, I shaved it and washed it and re-blocked it and I think it looks so much like new that I thought I'd blog it! Of course... taking pics of a sweater you're wearing without a tripod isn't easy, so the styled pic is plenty blurry, also I think a bit squished vertically, but I think you'll forgive me.
Project Cost: Brown Fisherman's wool, 2 skeins... I think about $18, Vintage buttons, purchased on Etsy, $5, along with a ton of others...
Project Time: To knit, 25 hours. To wash, shave, and block, 2 hours
Note to Self: Don't sleep in this sweater anymore!! It flattens out the ribbing in the back.
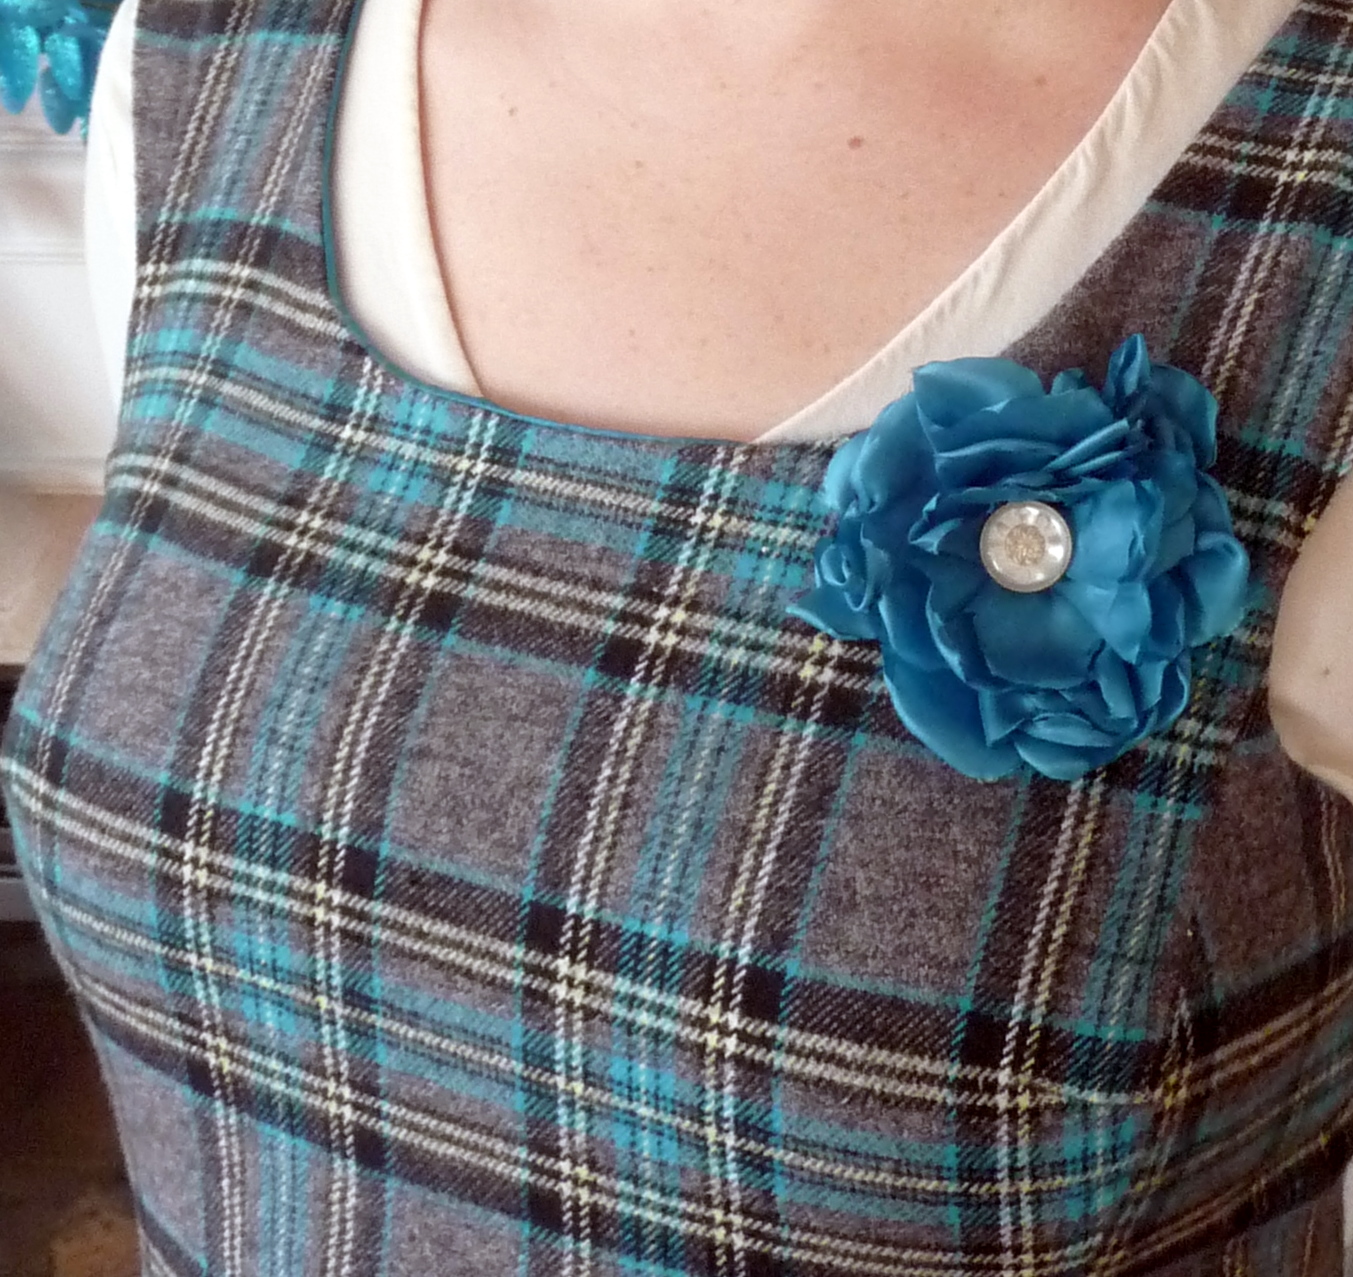
Hello all you readers... the two of you! I've finally got pictures of my new plaid dress!!! Even after a pattern change and fitting woes, it turned out to be a very successful print and has gotten tons of compliments already. I've worn it twice so far, out dancing with my hubs the day I finished it... with a white collared, button up blouse (with a little white embroidery on the collar, so ladylike!), with black fishnets and black boots... sort of a good girl gone bad look... And shopping yesterday! I got hubs to take some pics right before I left... I tried the dark tight, colored shoe look that's so in... I'm.... ambivalent about it. Should I have gone with black lace or fishnet or something???


Here you see the blue flower I knew would look so well, and I have to say I'm VERY satisfied with the fitting of the dress, especially through the bustline, though I didn't make a muslin first... the only thing I somethimes think I maybe should have done is either narrow the strap or widen the scoop?? I did alter the neckline by a good three inches, and I think it turned out wonderfully. I didn't quite get the plaid to line up on the back... I should have cut the back pieces out one at a time and made sure it matched perfectly... ah, well... it sure does take a lot of time and patience to get things just exactly how I want them!